How To Setup Quick And Nimble Using Cocoapods
Intro:
I just recently had the opportunity to do a bowling kata with Swift, and I must say it brought me back to my Java days. The down side is that just finishing a Ruby app and making this transition to a strongly typed language really does put you through a mental exercise. I’m very happy I decided to start programming with Java as it would have probably been difficult to pick up Swift so quickly. Anyway…on to more important things, such as todays topic, which is installing Quick and Nimble, a nice testing framework that originates from the famous RSpec.
My mentors tasked me with finding a testing framework to use with Swift and I gravitated towards Quick and Nimble, because of its readability. The unfortunate aspect of all this, was the inability to quickly setup Quick and Nimble from downloading to its implementation in Xcode. No offense to the Quick and Nimble Documentation, but it just wasn’t enough for me to get everything up and running quickly. In this post I will go step by step on how to download Quick and Nimble as well as, how to set-up your first test case.
Installing Quick and Nimble using CocoaPods
If you are not familiar with CocoaPods then the documentation leaves much to be desired. I’ll go over the five necessary steps below using macOS:
1.) Install CocoaPods as a gem 2.) Create a project in Xcode 3.) Create a PodFile 4.) Install Quick and Nimble using CocoaPods 5.) Link Quick and Nimble to your tests
1.) Install CocoaPods as a gem
If you have ever downloaded a gem, then this should be a fairly straightforward step if you have RubyGems installed. If you don’t I highly recommend downloading it using the package manager “HomeBrew” for macOS. To download CocoaPods, use the following command in your command line:
gem install cocoapods
Now, you may require to use the sudo keyword if your machine is setup differently. If you receive the error:
You don't have write permissions for the /Library/Ruby/Gems/2.0.0 directory.
use:
sudo gem install cocoapods
Now it may seem like nothing is happening, but the install should be going as expected. If you are the type that needs to visually see the process you can use the following:
pod setup --verbose
Personally, I just trusted the machine and didn’t use the verbose command.
2.) Create a project in Xcode
As I write this post I am using Xcode version 8.2.1, so some things may look different if you are using a different version.
Go ahead and startup Xcode and you should see the following:
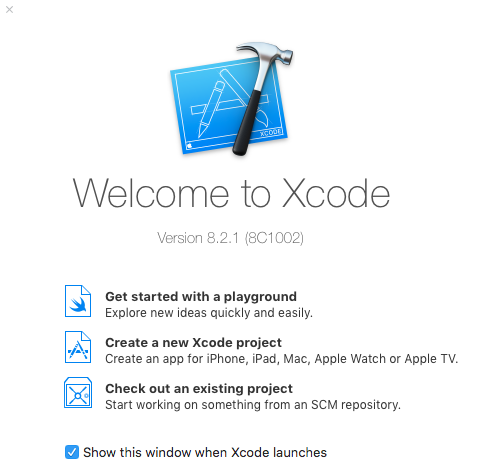
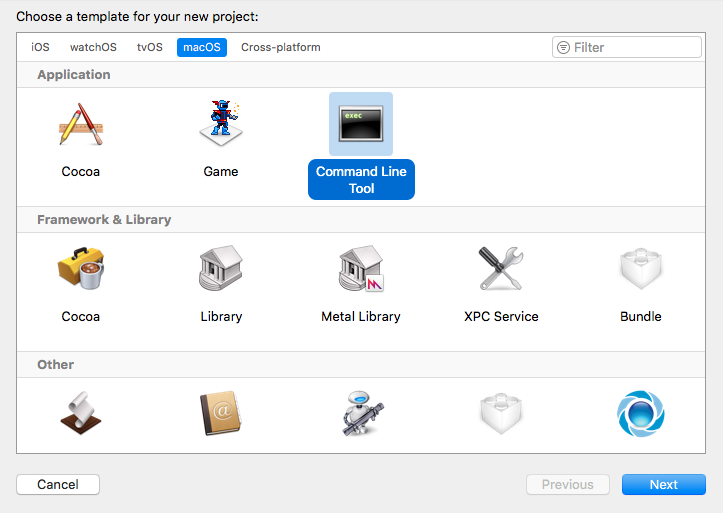
From here you will create a new project, not a workspace, but a project. I chose a “command line tool project” for my needs:
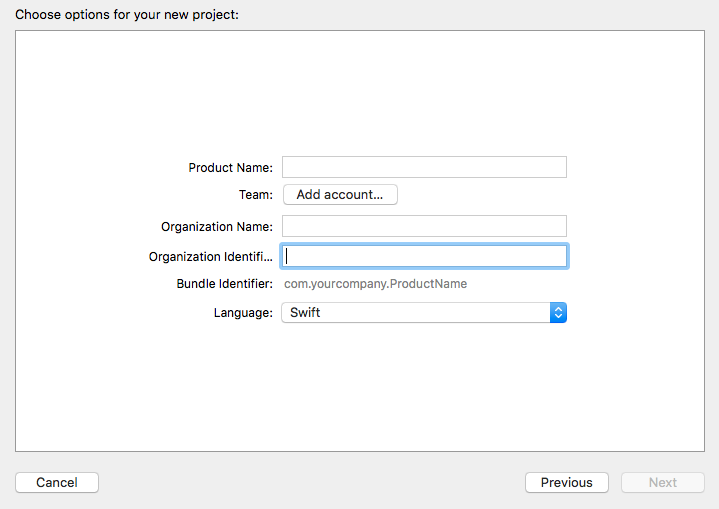
You will then be presented with the project options screen, which you can name as you wish. For this tutorial I choose QuickAndNimbleSetup for the project name.
You will then be presented with a project screen:
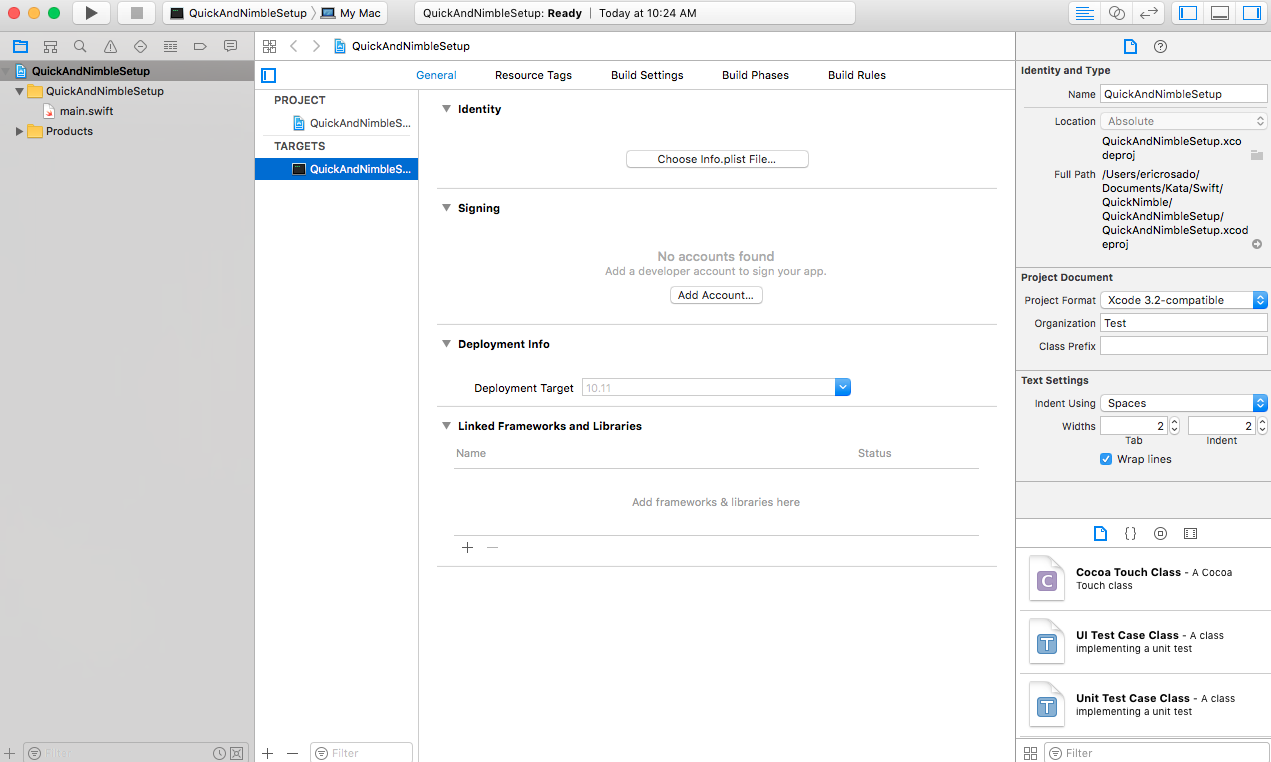
At this point we need to create our first unit test file into our project. Right click on the project, which for me shows a blue document image (looks like a blueprint) followed by QuickAndNimbleSetup, and choose “New File.” Here you should be presented with the following:
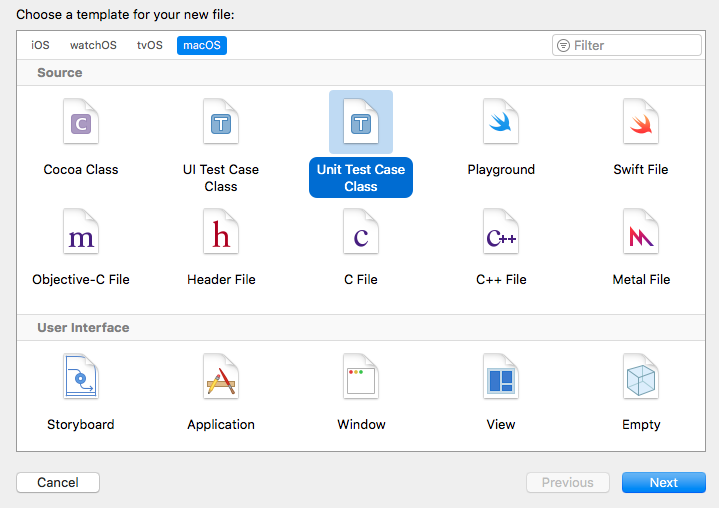
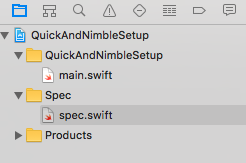
Here you should choose “Unit test case class,” which is highlighted in the image above. I named the file “spec.” I then created a spec folder by right clicking on the blue document image followed by QuickAndNimbleSetup and chose “new group” and named it “Spec.” Here is what the project looks like so far:
3.) Create a PodFile
At this point you want to connect your project to the Quick and Nimble framework using CocoaPods. In order to do this we need to create a “PodFile.” In the command line, traverse into your directory which holds your QuickAndNimbleSetup (That’s if you named it that.) Project. Once there you want to type in:
pod init
to create a PodFile. Open the PodFile using your editor of choice. Instead this PodFile we want to target the frameworks we want to include in this project by typing the following Ruby code in the file:
# Uncomment the next line to define a global platform for your project
# platform :ios, '9.0'

target 'QuickAndNimbleSetup' do
  # Comment the next line if you're not using Swift and don't want to use dynamic frameworks
  use_frameworks!

  # Pods for QuickAndNimbleSetup
  def testing_pods
    pod 'Quick'
    pod 'Nimble'
  end

  target 'Spec' do
    testing_pods
  end

end
Notice that I am targeting my “QuickAndNimbleSetup” project and my “Spec” folder to utilize the Quick and Nimble frameworks.
4.) Install Quick and Nimble using CocoaPods
So far we have laid the ground work for our Quick and Nimble with the PodFile, but now we need to install Quick and Nimble using CocoaPods. In the command line in the directory that holds your project type the following to install:
pod install
That’s it! You downloaded the Quick and Nimble files! Now comes the tricky part.
5.) Link Quick and Nimble to your tests
Being new to Xcode, I’ve found that learning where everything is, is half the battle. Lets connect these frameworks to our tests by clicking on your blueprint for your project (the blue document image followed by QuickAndNimbleSetup) and click on the tab that says “Build Phases.”
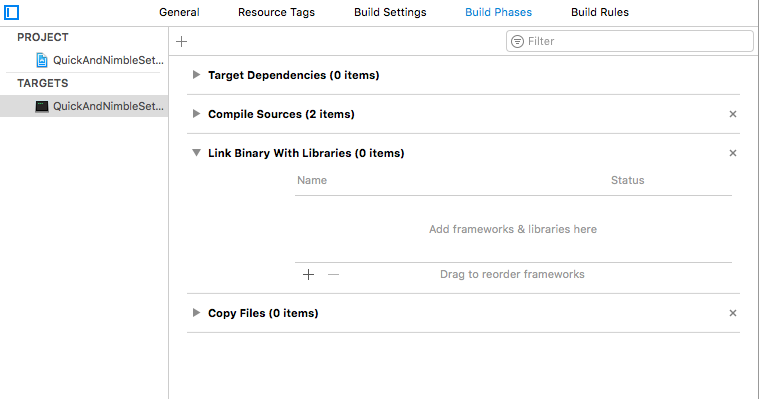
In “Build Phases” you want to click on “Link Binary with Libraries” and press the “+” to add your Quick and then Nimble frameworks (Essentially pressing the “+” twice. Once to add “Quick” and the other to add “Nimble”).
You are almost there! The very last thing you will need to do, besides writing out your test is to click on your main.swift file in Xcode and on the right hand side you should see a menu (if not hit the button that looks like a square with a blue vertical line on the right side, located on the top right corner) that looks like the following

and you want to click on the “Spec” button to insure your spec file is linked to your “main” file. That’s it!
Conclusion
Setting up your environment will take some time as you can see, but in the end it is totally worth it to use such a great Testing Framework like Quick and Nimble.